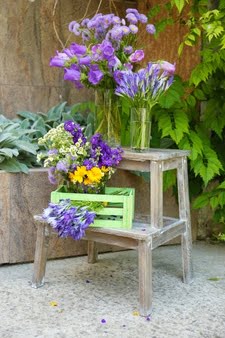
If you’re looking for a project to do, why not try a DIY 3 tier planter? It will look good in your yard. You don’t need a big area for it and maximize whatever size of space you have. Plus, it will be a great home to your herbs and vegetables. You don’t have to go to the market anymore. Next time you need vegetables and herbs, you can get fresh ones within the comfort of your homes. The best thing is, it’s easy to make. It can serve as a bonding activity for you and your family. Listed below are steps you can follow for a fuss-free DIY 3 tier planter.
Canvass your board
It is good to use woods to create a DIY 3 tier planter. You can save money if you have any excess wood left from a previous project. Be sure to pick a naturally rot-resistant wood to prevent moisture damage like cedar, redwood, cypress, or teak. One may also use untreated pine. However, this wood type needs a seal to be completed. Cedar is commonly used because of its ability to resist weather and bugs naturally. It also develops a gorgeous patina over time. However, cedar can be expensive.
Prepare the materials
Once you have your boards, cut them according to the size appropriate to your space and how wide you want your planter box. All in all, you will have 15 cut boards. For the front and back of the boxes, you will need six boards. For the sides, another six boards and three boards for the bottom of each planter box. You will also need a frame for your box. A 2 x 2 will be optimal for this since they provide sturdy support without being too heavy. You will need two 2 x 2s of the same height. The height will depend on how tall you want your DIY 3 tier planter.
It will serve as the vertical supports. You also need another 2 x 2s about the same width as your planter box to strengthen the support. You will put it at the bottom part of the two vertical supports. Finally, you should also have 2 x 2s, which will serve as the diagonal support. Cut these diagonal supports’ end at a 30-degree angle. To secure your boards, you need deck screws.
Assemble
Put together the cut boards needed for one planter box. Pre-drill all holes and assemble the box with your deck screws. The outcome expected is a three-dimensional box with an open top. Do this for the next two planter boxes. Don’t forget to drill holes at the bottom of each box. It will serve as your drainage. You will start with the uppermost part of the planter box. Set aside one assembled box.
Next, you will place the vertical supports on the backside of the set-aside planter box. Pre-drill and put together. About ¼ below your vertical supports, drill one 2 x 2 horizontally. It will serve as the leg brace for your DIY 3 tier planter. The expected outcome is one planter box with vertical supports. To make the planter box stand, you will need two 2 x 2s with both ends cut at a 30-degree angle. Position these along the first planter box’s sides diagonally. Secure using deck screws. You will now have one planter box supported vertically and diagonally. Now it’s time to position the remaining two planter boxes, one for the middle and the bottom part. Make sure to arrange the boxes leaving 2 ½’ space between each. Secure each planter boxes by attaching its sides to the diagonal support.
Decorate your planter box
What’s good about your DIY 3 tier planter is that you can have a creative-looking garden. There are lots of ideas to apply in terms of decoration. You can paint your planter box in bold colors or soft pastel colors if you want a colorful look. For a cool rustic look, you can leave it as it is. If you want it neat, you can stain the wood. When you’re done, you can now plant whatever herbs and vegetables you desire. You can uniformly put your plants. You are also free to put different plants on each tier. For those looking for something to add to their garden, this is the best project for you. It’s easy to make. Plus, you can save time and effort from going to the market when you have fresh herbs and vegetables waiting to be picked in your garden.


